 Hanki
Quick start
Download Hanki Tools, verify the file, run your first read-only scan and choose what to do about each finding, in five short steps.
This walks through a first session: from download to a reviewed result. Nothing on your PC changes until step 5, and only if you approve it.
1. Download and verify
Get the latest release from the download section or GitHub Releases. Each release has a portable ZIP and, from 0.19.0-rc.8, a setup installer, each with a matching .sha256 file. Compare the checksum before opening the file:
Get-FileHash .\HankiTools-VERSION-win-x64-setup.exe -Algorithm SHA256The hash printed by PowerShell must match the one in the .sha256 file. Getting Hanki covers both packages, Scoop and updates.
2. Start Hanki
Run the installer, or extract the whole ZIP to a local folder and open HankiTools.exe. Releases are not code-signed yet, so Windows SmartScreen warns before the first run. Run Hanki as a standard user: it asks for administrator approval only when an action needs it.
3. Scan your PC
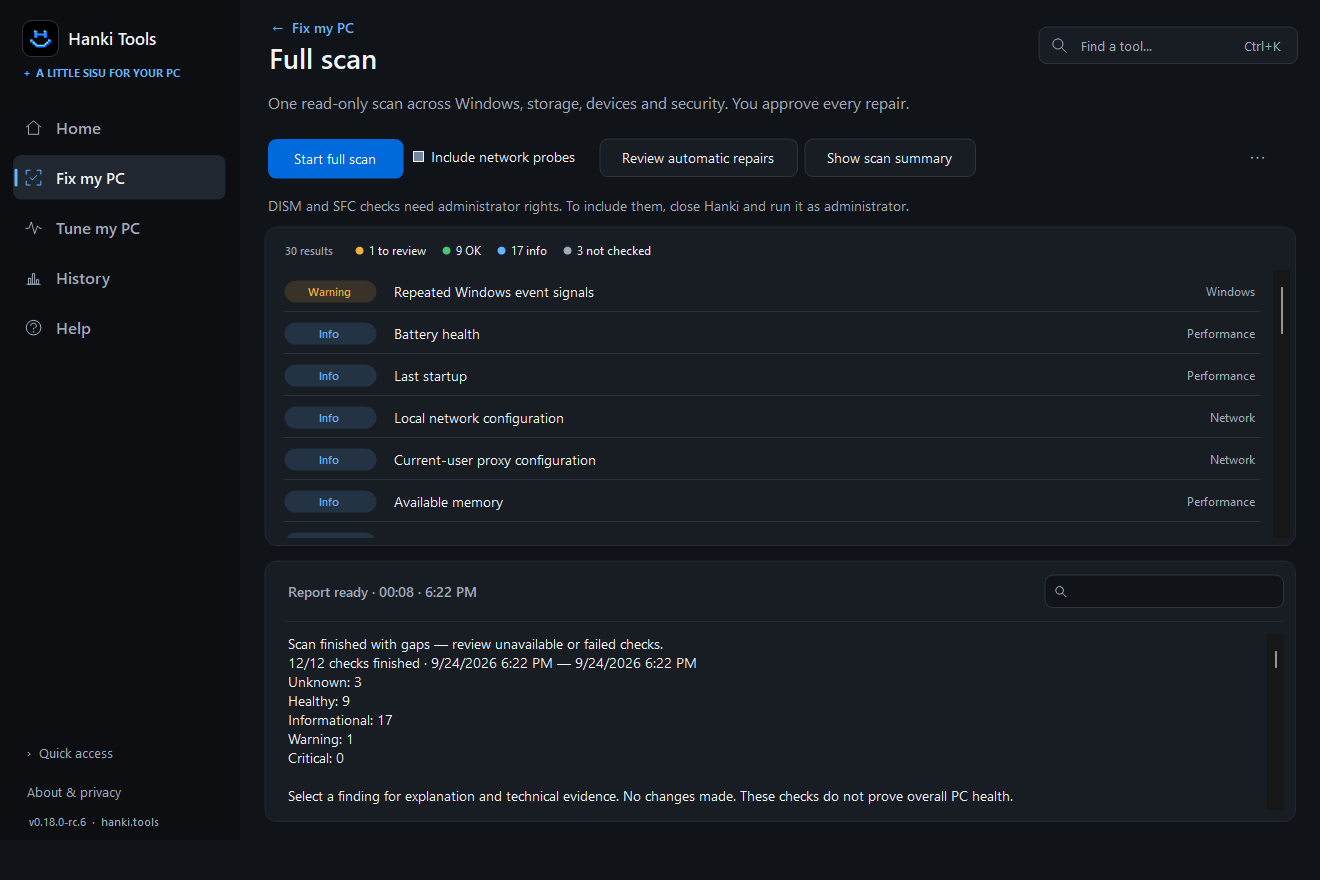
On Home, choose Scan my PC on the Fix my PC card. The full scan is one read-only pass across Windows, storage, devices, security, app crashes, network link speed and clock sync. Network probes are off unless you tick Include network probes.
4. Read the results
Findings that need attention come first. Each check ends with a status (Good, Review or Problem) and a suggested next step; technical details stay one click away. Other completed checks and checks with missing evidence expand separately. A cancelled or incomplete scan never reports a clean bill of health.
5. Choose what to do
Every finding offers a manual next step, often a link to the tool that shows more. Where Hanki supports a change, it shows a review of exactly what will change and where the undo record is kept before anything runs. Scans are saved in History → System actions so you can compare later.
Next steps
- Want more speed or smoother games? Try Tune my PC.
- Learn the layout, search and keyboard shortcuts in Using the app.
- Know how to undo a change before you make one: Recovery and undo.
Updated · Found something out of date? Report it on GitHub.